How to set up a custom domain
If you're already using ngrok with subdomains of an ngrok owned domain but would like to have your tunnels available from a domain that you own, you're in the right place.
Let's assume you've registered a domain name like example.com with a domain name registrar and you want to use it with ngrok. First you'll need to decide exactly which DNS name you want to use. Because we assign each of your custom domains a randomly-generated name under our domain to use as a CNAME record value, we usually recommend you choose a subdomain of your primary domain rather than the primary domain itself. So let's say you're going to set up foo.example.com.
To get foo.example.com working with an ngrok tunnel you'll need to perform one step within your ngrok account dashboard and one step with the DNS host for your domain name. In many cases your DNS records are hosted by your domain name registrar, but not always.
Add your domain name to your ngrok account
Add your domain name to your ngrok account. We currently call this process "reservation" and you can do it from the domains page of your ngrok dashboard.
Click "New Domain" and then put foo.example.com into the form that appears to add that domain to your account. Once validated you can also add a Description, attach an Edge and select your TLS Certificate configuration (we recommend our automated TLS certificates).
After adding your domain you should see instructions related to creating a CNAME record. Copy the value of your newly-added domain's CNAME target hostname, which will be something like <random-string>.<random-string>.ngrok-cname.com.
Create a CNAME record
Head over to your DNS provider and create a new record on the example.com domain. Every DNS provider has a distinct user interface but just by way of example here's what this interface looks like when setting up DNS records with Google Domains:
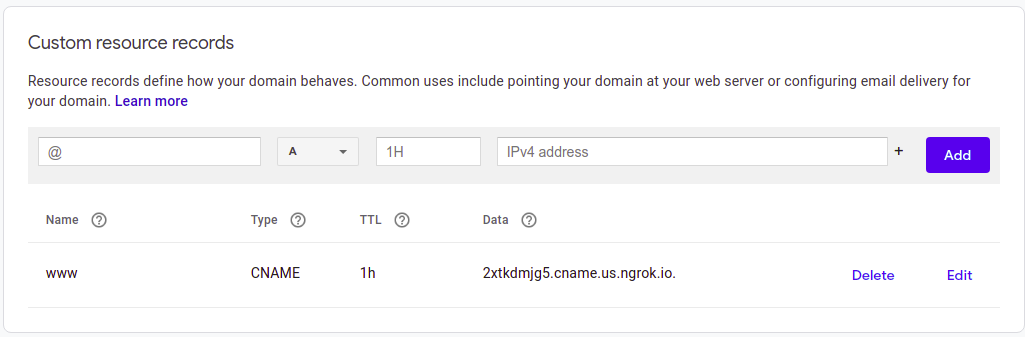
You'll create a record of type CNAME where the name is foo and the value is your ngrok CNAME target, <random-string>.<random-string>.ngrok-cname.com. This will ensure that any DNS queries for foo.example.com are resolved with an IP from our service edge.
Once created it may take a few minutes before the new record is reflected in the DNS, but you can confirm that your record is created using a command line tool like dig or nslookup. Or if you still have the ngrok dashboard displayed with your CNAME target hostname from Step 1, you should be able to use the "Check Status" button at the bottom right of the page to confirm that your record was created correctly.
Connect your tunnel
Once your DNS record is in place you can create a tunnel using your new domain. Try running:
ngrok http --domain=foo.example.com 8080
and presuming you're actually running an application on port 8080 then making an HTTP request to https://foo.example.com should return a response from your app.